Showing posts with label Campaigns. Show all posts

Thursday, July 17, 2014

ImagiNation Speculation

So...If I am going to do this fictional medieval world thing, what are the basic goals and parameters of what I would be trying to accomplish?
Border troubles in the Duchy of Alten

Goals:
  1. Have a place to fight miniatures games in.
  2. Create a little piece of a world that has enough detail that the games seem to be grounded in some sort of (un)reality, in the sense that my fictional people are fighting these battles for a reason, and not in a vacuum. What has come before shapes the here-and-now, and what happens now affects the future.
  3. Have fun creating whatever I end up creating. In most of my hobby endeavors I have come to embrace the fact that for me it is almost entirely about the journey and only very marginally about the destination. There are those who can set a goal to do Project XYZ, and then buy, paint and focus on that project until it is done. I am the antithesis of that person.
  4. Use this as an excuse to paint more miniatures. With the leeway to create national colors, regional heraldry etc...
Considerations and Questions:
  • One of the main points of this is to play games. The structure of the world, first and foremost, must support gaming story lines.
  • The games will be played with the miniatures I have in my collection, or can buy and paint (c. 1350-1425AD). While some "generic" enough miniatures will serve a variety of uses, it is inevitable that some of the more ethnic types of miniatures be associated with certain fictional countries. For example, while I continue to work (slowly) on my historical Ottoman army, it is highly likely that there be a place on my map, called whatever, where my Ottomans will live and fight, but will not be "Ottomans". The very nice range of Old Glory Eastern Europeans from the Balkans, Hungary and Romania could also fill a space, or spaces, on my map. Or even the Mongols as stand-ins for "steppe people". Unless everyone is going to look uniformly vanilla Western European, this is pretty much unavoidable.
  • To differentiate the various areas and countries on the map, it is almost inevitable that I find myself thinking "this country will be France-ish, this area can be German-ish, and this country could be Northern Italy-ish". If nothing else, clustering place names into things that sound like the above helps create a distinction between different areas, which is useful. So there will likely be areas of English sounding names, and Germanic names, and Italian-esque names...
  • I find naming things to be the toughest part of this sort of thing. After all, once you start to build a story around certain names you are sort of stuck with your choices, and if you don't like what you are stuck with...well...
  • As I expect this to be a very off-and-on sort of endeavor, I am thinking I should spin this off to its own blog. That way, even if things progress in fits and starts (as I expect them to), they will all be contained in one place without a lot of family stuff and various other things taking up weeks or months of space in between.
Which brings us to...

The Basic Plan:
  1. Start another blog (linked to here of course).
  2. Work on my original "small border area" in sufficient detail to start playing games when the mood strikes.
  3. Continue fleshing out the larger world in very broad terms.
  4. Have fun with Hexographer.
  5. Add detail to different areas as the mood strikes.
Sounds simple enough I suppose.

Any comments from lurkers who might stumble on this would be welcome.

Wednesday, July 16, 2014

An ImagiNation...with Scope Creep

Scope Creep: When a project of modest proportions (or any planned proportions, for that matter) takes on a life of its own and becomes bigger than planned...and bigger...and bigger.

But I am jumping ahead.

Most of my wargaming is a solo endeavor, but to keep things interesting, and to make for a better story when blogging about my solo games, I often try to frame those games in the context of some manufactured "campaign". These generally peter out after a few games because I lose interest in trying to fit what I am playing into a historical context, with proper map references, time lines, etc. I probably shouldn't get hung up over this stuff, but I do.

One of the things that has always intrigued me, and seems much more prevalent amongst our English wargaming brethren, is the idea of an ImagiNation; a fictional place, maybe or maybe not linked to reality in some way, but set in a specific time period from a technological standpoint. From browsing the web, ImagiNations set in "Europe-ish" during the Seven Years War period seem especially abundant. Seven Years War figures and rules are used, but the places and people are made up. Sometimes they are "near" Austria or Prussia, sometimes not. This gives great leeway in letting your creativity run as rampant as you want. So that's the intriguing part. I suppose liking this kind of idea is the same thing that made me always want to be the dungeon master when playing D&D back in the late 1970's and early '80's. Drawing maps. Imagining worlds. Writing history instead of reading it.

I have considered doing something along these lines for a while now, but finally decided that I would scribble down a few ideas on setting up a modest little imaginary world in which I could use my medieval armies from time to time.

Things began harmlessly enough. I would need a small kingdom, or part of a kingdom, which would need some neighboring areas to interact (and fight) with. My first sketch map of such a realm, on the back of a piece of scrap paper, was simple enough. A semicircle represented the edge of our new "home" kingdom. Adjacent to that border were a few different adjoining areas, exact content to be decided later. A few bits of terrain were sketched in. A basis of an initial storyline was imagined.

Having made a few simple sketches, I began to wonder what kind of mapping software (free if possible) might be out there for creating simple hex-based maps. Within moments of a first Google search, I was looking at a website for a product called Hexographer. It has a free version and a pay version, and the free version seemed to have all the functionality I was looking for, and the samples shown were nice looking "retro" style maps that would fit the bill perfectly.

Within minutes I had downloaded the free version, and in less than an hour, I had created the core of the little map below; a border area of two neighboring realms.
A small border area with two antagonists

But Hexographer was so easy to use, and so fun to play with, that over the course of another couple hours I had expanded a good bit beyond my original border area. After all, I couldn't help but wonder what the rest of those two kingdoms looked like, and who their other neighbors were. After all, they had to fit into the larger world somehow, right? So the map started to expand. And more of the world began to take very loose shape in my mind.
Two kingdoms take shape...

And that area had to fit into an even bigger picture, right? Where were their borders, and who could other antagonists be? Oceans needed to be somewhere. Which makes for coast lines. You need water. And some crude attempt at realistic geography should be attempted. And the geography in turn would dictate where rivers would run. And rivers and mountains and other terrain determine where the trade routes would be, and where cities would grow, and where borders might reasonably end up. Along with thoughts on who were enemies of who, and where the historical allies might be. And what the current situation might be on day one of this new land. Yikes.
...and the world grows some more

Which brings us back to scope creep. In maybe a half a dozen hours in little bits and pieces over the past week and a half, I have gone from a very simple pencil sketch doodle on the back of a sheet of scrap paper to a sketch outline of a much much larger world, one quarter (the northeast quadrant) of which is shown in the final map above. All because I found Hexographer, and had fun playing around with it. Once the creating started, it became very hard to stop. Not that I tried all that hard to stop.

What comes next? I don't know. Maybe I'll figure that out when I am done drawing more maps and writing more history in my head.

Monday, November 11, 2013

Impetus Campaign - Beren Roadblock

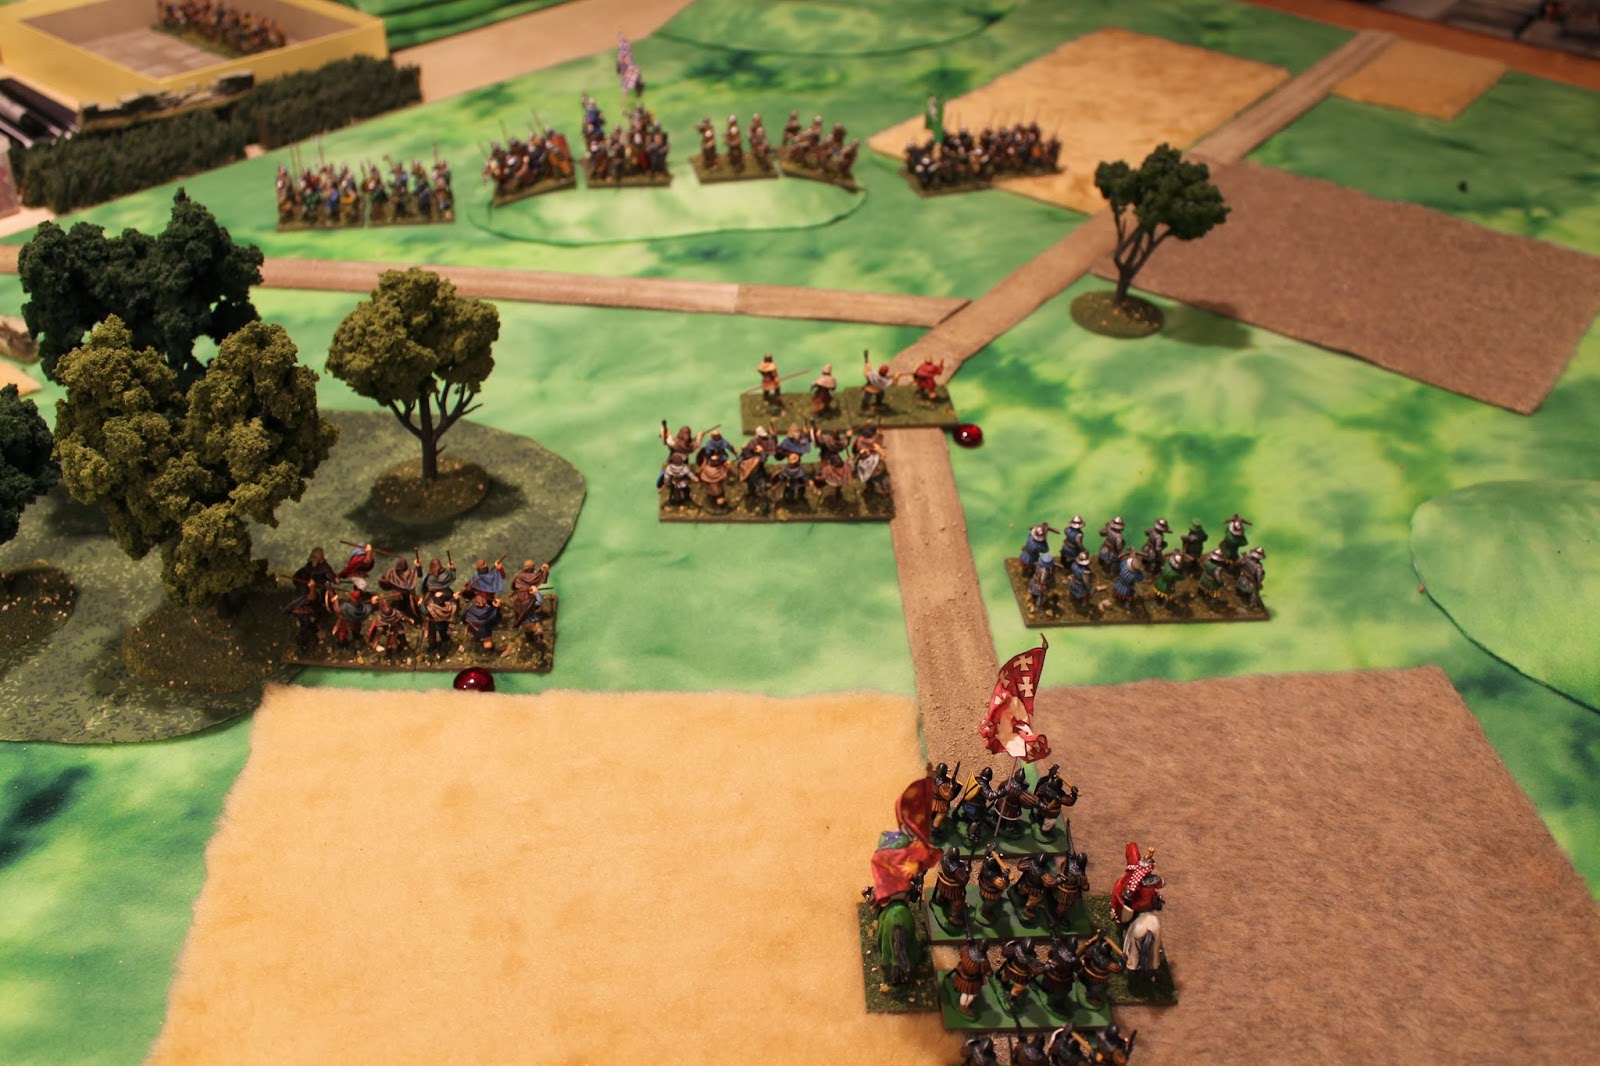
Henry de Cheraute's detachment is on the road to Beren with a little pillaging in mind when they find the road ahead blocked by a small force of enemy infantry...

Turn 1 (Henry advances...)
Friendly - All units move ahead two moves, only the left flank light infantry under Larcevaux disorder as they enter the woods.
Enemy - All units are on opportunity. The crossbows elect to fire on Boncarre's skirmishers, rolling one damage that luckily only causes disorder (skirmishers are very fragile with a low VBU and thus a low critical number - one damage and one bad cohesion test and they can vanish in an instant).
End of Turn 1

Turn 2 (...and advances some more...)
Enemy - The crossbows fire again, missing. No other actions.
Friendly - Larcevaux's light infantry fail to rally and move ahead into the woods. Pominville's heavy infantry move twice along the road (but not on it) and disorder. Boncarre's skirmishers rally, move ahead once, fire their javelins at point blank range at the crossbows...and miss. Oops. Morenz's light infantry move up behind the skirmisher screen. Wilkinson's crossbows move forward once and shoot at the heavy infantry directly to their front and cause one damage, but this only disorders the target. Cadogan's little band of Scottish pike men move forward along the road then form up, ending in disorder.
End of Turn 2

Turn 3 (The enemy gets aggressive)
Friendly - Boncarre's javelinmen breathe a sigh of relief at the double move (two friendly turns in a row; lost initiative last turn, won it this turn) and shoot at the crossbows, disordering them. Wilkinson's crossbows hold their ground and shoot at the disordered heavy infantry, failing to hit them. Pominville and Cadogan both fail to rally and move once forward. Larcevaux's men in the trees rally and move once forward, clearing the edge of the woods. Thomas' mounted men at arms wheel toward the open flank and move forward, disordering.
Enemy - At the start of the enemy turn, I roll a d6. On a roll of 6, some number of enemy units will appear, but the roll fails. I step back and survey the field, noting that I have pushed Henry's lighter units forward in advance of the heavier troops, leaving them somewhat exposed. I decide to randomize the enemy reaction, and on a d6 scale of 1 being very cautious through 6 being very aggressive, roll a 6. Aggressive it is, then. I decide the most logical course of action would be to attack with the enemy right and center, and refuse the left flank unit against the advancing knights. The left flank heavy infantry moves once to the rear, disordering. The crossbows rally, shoot at the skirmishers at point blank range and miss again. On the enemy far right (left of the picture), a unit of levy heavy infantry charge forward into Larcevaux's light infantry, disordering themselves as they charge far enough to make contact. In the ensuing fight, no casualties are inflicted and the units will remain disordered and locked in melee. Next, the enemy commander urges his own unit of heavy spearmen forward, wheeling once and charging Morenz's light infantry behind their skirmisher screen. Boncarre's javelinmen, seeing the enemy heavy infantry charging in from off to their side, toss one last round of javelins ineffectively before dispersing and fleeing the field. [A review of the Evading rules when this situation arose showed that a skirmisher unit being charged by a unit that began entirely outside of its frontal projection does not permit an Evade move...live and learn]. The enemy unit continued its charge through the fleeing skirmishers and into Morenz's unit in good order. Both units cause damage but only manage to disorder each other; they also remain locked in melee.
End of Turn 3

Turn 4 (The enemy waver...)
Enemy - The enemy win the initiative, so now they get a "double move". Another reinforcement roll fails. The melee between the levies and Larcevaux's men goes another round, causing a loss on the levies and forcing them to retreat 3 inches. The enemy commander's men fighting against Morenz's light infantry are not as lucky. In a ferocious and bloody melee, 2 losses are inflicted on Morenz, but the enemy suffers 3 losses in return. Morenz suffers a minor leg wound, but the enemy commander is swarmed upon as his unit retreats and is killed. Amidst the carnage to their right, the crossbows fired on Thomas' knights and inflicted a loss.
Friendly - Larcevaux's men fail to rally but charge the retreating levies to their front. They cause one damage, and yet another "6" on the cohesion test has the levy unit rout. Morenz, apparently distracted by his wound, fails to rally and holds position. Wilkinson's crossbows target their counterparts and cause one damage. The cohesion test results in the third "6" in a row, and the enemy crossbows rout. Seeing the combat in front of them, Pominville's heavy infantry rally and move ahead, as do Cadogan's Scots. The knights fail to rally but wheel to face the remaining fresh infantry unit.
End of Turn 4

Turn 5 (...and then crumble)
Friendly - Morenz's light infantry fail to rally, but move to the rear, interpenetrating Pominville's fresh troops as they go. Pominville rallies off the resulting disorder and charges the remnants of the enemy commander's unit. In the ensuing combat, the enemy unit takes its final loss and routs from the field, effectively ending any organized resistance.
Enemy - There is nothing left for the enemy but for the survivors to flee the field of battle as best they can, as only one unit remains.
End of Turn 5 / Game

Game recap and a few more thoughts on Impetus
This was a short little game that ended very quickly once the forces became engaged. An untimely string of three "6's" in a row on enemy cohesion tests effectively vaporized the enemy battle line in a matter of moments. Without those bad die rolls, this could have been a very different game (or certainly a longer one!).

These little games continue to serve their purpose for me. I am becoming more and more comfortable with the core rules and can focus more on learning the implications of the various charts and rules and their effect on game play. I still haven't come across anything that I really dislike. There are a few things that I still need to get used to, and formulate an opinion on. One is the fact that a poor cohesion test die roll can make a lesser unit disappear instantaneously; one moment fresh and perfectly fine, the next moment gone. The other is the lack of any morale rules. Nothing effects a unit, despite whatever may be going on around it, until the whole command reaches its break point and picks up and disappears. I suppose this works fine for a fairly simplistic game.

One possible criticism I would have is a similar one that I would have with many other miniatures game rules, and that is the draconian adherence to unit facing with regards to movement and charging. In truly linear periods such as the Seven Years War or the Marlburian period, this makes sense. I would argue that in much of the medieval period, where "units" as we would consider them would be more along the lines of "a bunch of guys", things shouldn't need to be quite so rigid. We need structure in the rules, I understand that. But I find that the result of the "thou shalt move very rigidly and in geometric precision only" rules tend to result in tabletop occurrences that often defy common sense. Movement often devolves into a weird stylized version of chess. I do not like the commandments of "thou shalt not deviate from a straight forward move." Or "thou shalt not wheel while moving." Or "thou shall only be permitted to wheel if it is the very first thing you shall do during your move." Why? If movement is a function of time spent and ground covered, why can't I wheel during my move and not only at the beginning (or the end), or as an entirely separate movement action? This is why I find games like Armati to be an unplayable exercise in ridiculousness. Which isn't to say that Impetus movement rules are any worse than most, they just trigger a personal pet peeve of mine, that's all.

All that being said, there is an aspect of the movement rules for Impetus that I really do like, and that is the opportunity to have multiple moves, discipline tests permitting, and with the risk that pushing your men too hard will result in disorder, leaving them vulnerable to the enemy. This creates good decision making points in the game, and adds a lot of uncertainty. This is good stuff.

Campaign - Henry's easy defeat of the enemy force allows him to plunder Beren, pillaging the village and burning crops, mills and property. No substantial losses were inflicted on Henry's forces, although Morenz's light infantry took a couple losses, so I will put a note next to them (maybe next time they get a discipline penalty or something).

Next...I need a scenario #3...

Tuesday, November 5, 2013

Impetus Campaign - Henry's Choice

Henry surveys the field
Henry de Cheraute, advancing in a northeasterly direction to the north (left) of Raymond's main body with a predominantly infantry contingent, was sent to "investigate" the village of Beren. As his troops trudged along the muddy road to town, Gauthier de Morenz, commanding the light infantry advance guard, reported back that an enemy force was drawn up near a crossroads beyond the next ridge. Henry, riding with his men at arms under his younger brother Thomas, crested the ridge and surveyed the scene before him.

Ahead, beyond a small clump of trees, was a fork in the road. The left fork, curving to the north, led to Beren. The right fork continued east in the direction of Henry's next rendezvous with Raymond, where he was due by nightfall tomorrow. Centered on high ground to the north of the road fork was an enemy force that appeared smaller than his own. He did not see any cavalry, but his visibility was hindered by the trees and the high ground.

Thomas studied the scene for a few more moments as their foot soldiers clanked up the road behind them. Finally he spoke. "Well, brother, what's it to be? We could double back the way we came. Or force our way down the east road. Or fight."

Henry smiled and replied "My orders were to pay a visit to the good citizens of Beren. Let's go test these gentlemens' resolve..."
The (visible) enemy

Scenario #2
Through a bit of random selection, our second scenario will be a small fight between two primarily infantry forces. After laying out the basics of the situation I randomized whether Henry should behave aggressively (fight), moderately (bypass and head east) or cautiously (retreat). On a 1-10 scale, I rolled the low end of aggressive, so Henry's plan will be to attack, but prudently. If things do not go well, he will look to disengage and head east.

Henry's forces (with their newly named "captains"):
  • Commander Henry de Cheraute (Fair quality)
  • Mounted men at arms (Thomas de Cheraute)
  • Provincial heavy infantry [FP] (Richard Pominville)
  • Provincial light infantry, long spears [FL] (Gauthier de Morenz)
  • Provincial light infantry long spears [FL] (Emile Larcevaux)
  • Crossbowmen, class B [T] (Edmund Wilkinson)
  • Javelinmen [S] (Phillippe Boncarre)
  • Scottish mercenary pikemen [FP] (Robert Cadogan)

The defenders of Beren:
  • One leader whose rating will be randomized the first time we need to use it for something substantial
  • Two units of heavy infantry [FP] with long spears
  • One unit of crossbowmen [T] (class B)
  • One unit of town militia [FP]
In addition to these named forces, beginning around the time the troops become engaged, I will begin to randomly test for enemy hidden forces or reinforcements (size and type TBD if they appear). Henry might get a surprise of some sort...

...to be Continued

Impetus Campaign - What's In a Name?

Grace has been showing interest in the Impetus game I played recently (as she does with many of the games I set up, and figures I paint). When I was explaining the idea of a campaign to her, as a series of linked battles, she looked at the leader figures on the table and asked me "do they have names?" I said they didn't. She thought they should.

So we are coming up with a bunch of French-ish and English-ish names so that we can have a named "captain" in charge of each unit on Raymond's overall roster, not just the three generals. This is actually a good idea - it will make the characters of our little drama seem more real, and make for more interesting battle report write ups, especially in the sense of continuity from one to the next. It will also mean I throw together a few simple rules on these "captains"; losses inflicted on units during the course of a battle should have some chance of wounding, killing or capturing our named guy, much the same way in which attached commanders can be effected in the normal rules. These "captains" will have no impact on the game other than to provide color. At least that's the plan at this point, but who knows...

When I have concocted enough names, I will go back and edit the first battle report. We will have, for instance, references to "Giacomo Penneti's crossbowmen" instead of "the Italian mercenary crossbow unit."

I think I like the idea. Yay, Grace!

Saturday, November 2, 2013

Impetus Campaign - Cazalet Finale

Second and final part of the skirmish at Cazalet
Turn 6
Friendly - Longbows rally, shoot with 3 dice at the heavy infantry and miss. The mercenary crossbows rally, fire 4 dice at short range, score 2 damage resulting in 3 losses and rout/destroy the enemy crossbows on the hill. The remainder of William's forces work on forming some sort of battleline with the heavy cavalry and the heavy infantry billmen ending disordered. William and his knights edge forward.
Enemy - The heavy infantry fails to rally, and the two levy infantry units inch forward to stay hidden behind the hill.
End of turn 6

Turn 7
Enemy - Heavy infantry rallies. The enemy hold their ground.
Friendly - A battle line is formed, more or less, but the heavy cavalry, billmen, longbows and mercenary crossbows all end in disorder primarily because of the necessary obliqueing and sidestepping.
(I forgot to take a picture).

Turn 8
Enemy - One of the levy units charges into the billmen, who are advancing up the gentle slope to their front. The enemy wants to deny the hilltop to the billmen, and also take the opportunity to get an impetus bonus on their charge. The levies roll 4 dice (VBU 3 plus 1 impetus), score 3 damage, and inflict 2 losses. The billmen roll 4 dice also (VBU 5 minus 1 disorder), score 1 damage, but also inflict 2 losses. As this is a tie, both units remain locked in melee. The levies become disordered (the billmen already are, and since they took losses I didn't give them another for disorder on top of already disordered - I think I did this correctly...). 
Friendly - Mercenary crossbows fail to rally, move once forward and declare a point blank shot at the levy unit in front of them. Since this shot is likely to be very effective, the levy chooses to reaction charge the crossbows (they can do this as the crossbows have entered their 5 inch forward zone of influence and are shooting at them). My interpretation was that this charge happens in lieu of the shooting as the opportunity/reaction takes precedent over the triggering event (the declared shot), and this is point blank range where the missile unit is not a class A longbow. I believe a class A longbow would have been able to shoot as the levy charged in. The crossbows rolled well, causing 1 damage resulting in 2 losses for the levies, who failed to hit in return. The levies retreat 2 inches and end disordered.
The billmen activate next and fight their continuing melee against the other levies. No result is achieved and they remain locked in melee. As both units have 2 losses and are disordered, they roll very few dice and therefore it is hard to hit the opponent (billmen have current VBU 3 minus disorder for 2 dice, and the levies have current VBU 1 minus disorder for zero dice, and roll the minimum 1 die). The way I am reading the rules, there does not seem to be a minimum effect of a round of combat, so nothing happens.
The longbows shoot and disorder the heavy infantry behind the hedge. The mounted troops wait patiently.

End of turn 8

Turn 9
Friendly - The mercenary crossbows fail to rally, but still shoot 7 dice at the damaged levies in front of them (VBU 4 plus 4 bonus point blank vs infantry for class A crossbows minus 1 disorder). Only 1 damage is caused but the cohesion test for the levies goes poorly and they lose their last loss and rout. The billmen fight another inconclusive round of their melee with the other levies. The longbows shoot at the heavy infantry again, cause 1 damage, which due to more poor French cohesion die rolling turns into 2 losses. The light infantry move forward, the heavy cavalry remains disordered and William bides his time...
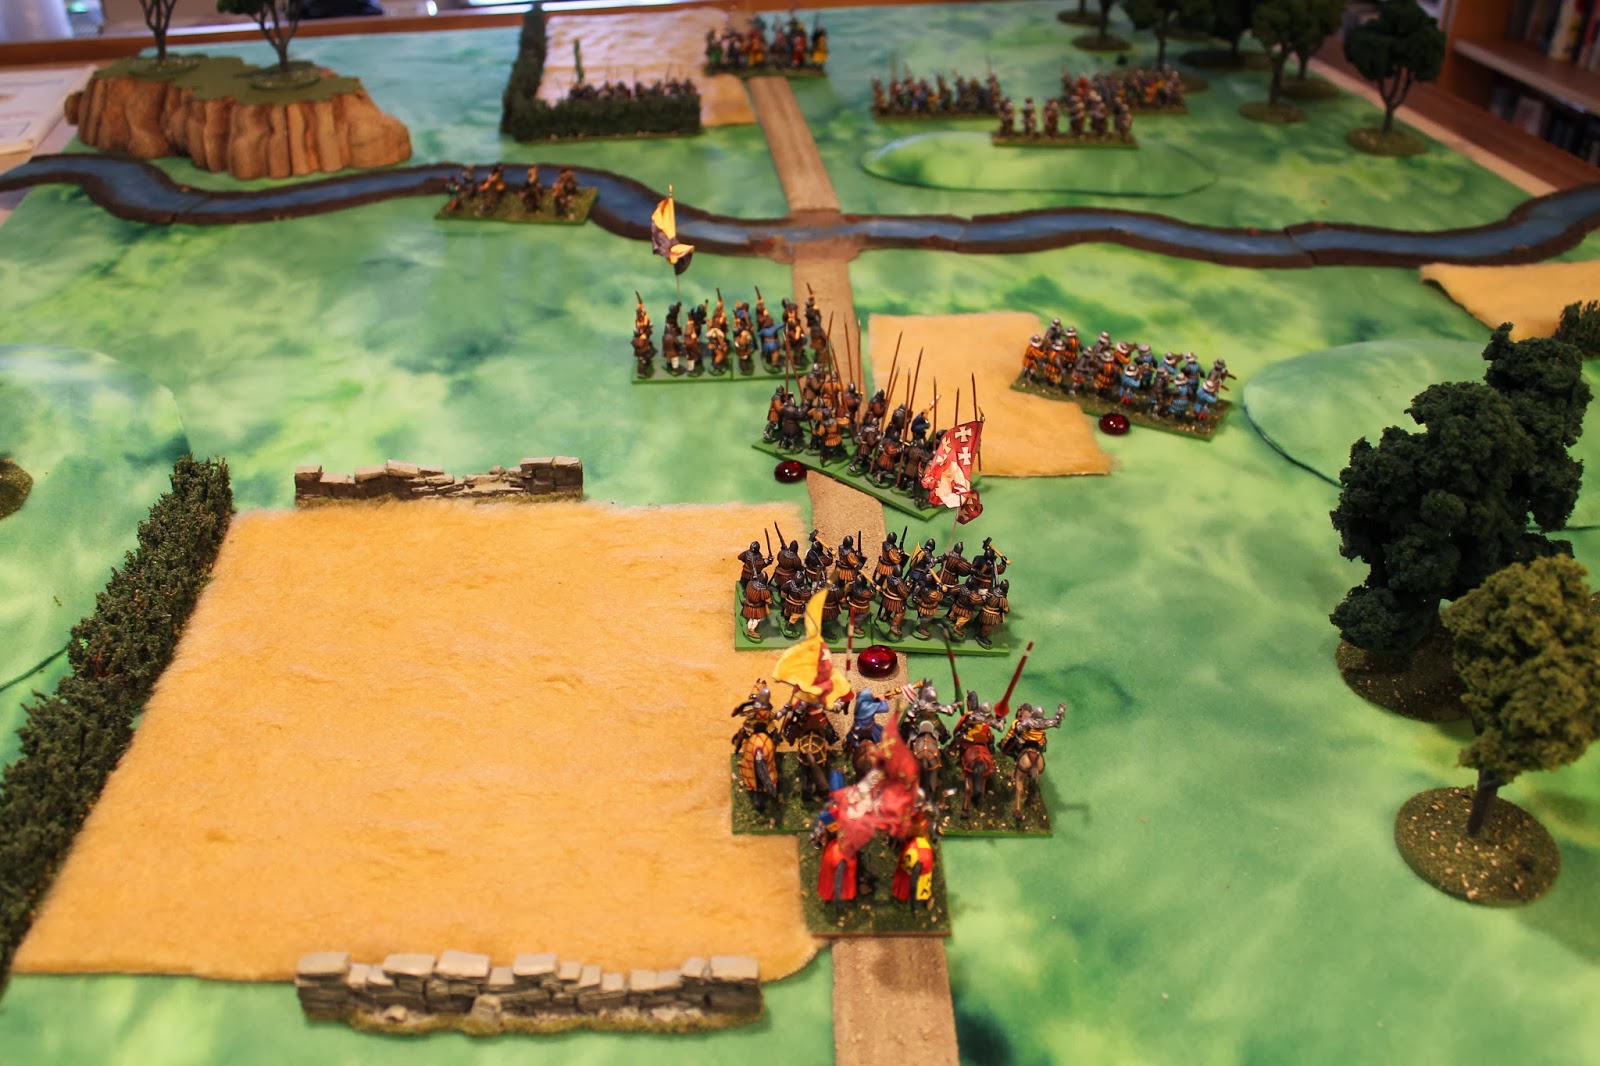
The Men at Arms clash in turn 9
Enemy - The constable sees the situation slipping away from him, and pride dictates (randomly) that he take matters into his own hands. He grabs his banner and spurs his men at arms forward down the road, aiming directly for William's banner. William, being charged in the front but not being on opportunity must pass a discipline check to countercharge, which he passes. He spurs his knights forward and they crash into the constable's oncoming men. Each side rolls 11 dice (VBU 7 plus fresh first round impetus bonus of 4). Both sides roll poorly, inflicting only a damage or two, and no losses to either side result. Both units become disordered and locked in melee. Neither attached leader is required to check for casualties as neither cohesion test rolled a "6".
End of turn 9
At the end of turn 9 we have two ongoing melees. The situation for the French blocking force is dire; the heavy infantry are being shot up with no real option but to stand and take it, and the brave levies are having a tough time with the better quality (and more numerous) opposition.

Turn 10
Friendly - The mercenary crossbowmen rally, move, wheel, and end in disorder. Still, they are able to shoot with 1 die across the field into the flank of the heavy infantry sheltering behind the hedge, but do no damage. The billmen fight another round of their ongoing melee and take a loss (their third out of 5) and retreat 2 inches back down the slope from the valiant levies. The longbows then target the heavy infantry, causing 2 damage and 2 losses, which sends them routing from the field.
The swirling clash of mounted men at arms continues. Each unit rolls 6 dice this time instead of 11 (VBU 7 and disordered). The constable's men take a loss and retreat 3 inches. William's knight roll for pursuit and catch the retreating French, precipitating another immediate round of combat. In this round, William's men take one loss and retreat from the fight. I am not sure according to the rules whether these retreat/pursuit cycles continue indefinitely or not, but I chose to not allow a second pursuit beyond the one already conducted in this phase. Lastly, the skirmishers fire into the flank of the French knights and surprisingly cause a loss.
During turn 10

Enemy - The constable urges his men forward one more time and crashes into William's knights. The French cause 4 damage but miraculously no losses. William's troops cause 2 damage which ends in 3 losses (poor cohesion check), along with a casualty check for the constable (cohesion die roll was a "6"). The constable escapes unscathed but retreats. William's knights pursue, catch the French, and fight another round of melee. William suffers 1 loss, but another cohesion roll of "6" for the French sees a total of 5 additional losses and the death of the constable.
End of turn 10 - Battle over

With the two best units on the French side lost in this turn, and the constable dead on the field of battle, the last vestiges of resistance crumble. William gathers his troops and continues his march to Cazalet and the rendezvous with Raymond.

Recap and Campaign Notes - This scenario did what I wanted it to do; it gave me an introduction to the rules. I can now reread certain sections of the rules and try to answer some of the questions I scribbled down as I played. Despite what ended up being, as expected, an easy win for William, there were some moments of potential future impact that could have turned on a die roll. Given that I am using this as part of a series of linked battles in a campaign, a bad cohesion die roll on any of a few different occasions could have gotten one of William's units beaten up pretty badly, and as we saw with the constable, it only takes one bad cohesion die roll to end a leader's career in an instant. As for the forces involved, there were no serious casualties, so there should be minimal impact to this contingent going forward.

I will post my thoughts on the Impetus rules themselves in a separate post.

Grace, who helped me push some figures around and was my designated dice roller for a few turns this morning, is already asking me when we will play the next scenario. I told her "soon Dear, soon"...

Impetus Campaign - Cazalet Part 1

Turn 1
Enemy - Wins the initiative and puts his impetuous Men at Arms and the crossbows on opportunity.
Friendly - Skirmishers and mercenary crossbows both take two moves and end disordered. Longbows move twice, end in good order, shoot at the enemy crossbows with one die and miss (4 die for VBU minus 2 for moves minus 1 for long range vs infantry).
Reinforcement roll fails (would have needed a 1).
End of turn 1

Turn 2
Enemy - Wins the initiative but nothing to do.
Friendly - Skirmishers fail to rally and make one move. Light infantry rallies and moves twice, disordering again. Longbows make one move and fire at the crossbows, rolling one damage but only disordering them. Mercenary crossbows rally and move once, firing but missing.
Reinforcement roll succeeds, so the heavy infantry will enter next turn.
End of turn 2

Turn 3
Enemy - Wins the initiative again. Crossbow fails to rally and so cannot go on opportunity. Nothing else to do.
Friendly - Heavy infantry makes three moves on the road and ends in good order. Skirmishers fail to rally again and move forward toward the stream. Longbows remain stationary and fire at the crossbows but miss. Mercenary crossbows move twice, wheeling and then moving ahead, ending in disorder. The light infantry fail to rally and only creep forward a few inches so as not to get in the way of the advancing reinforcements.
Reinforcement roll passes so William will arrive next turn at the head of his household Men at Arms.
The range advantage of the friendly longbows and mercenary crossbows compared to the regular enemy crossbows is substantial, but the friendly fire continues to have trouble hitting anything. We will continue to close the range.
The enemy sits and waits patiently.
End of turn 3

Turn 4
Enemy - Wins initiative, fails to rally the crossbows, who still don't have a target, as the nearest target is just outside of 15U (inches).
Friendly - Skirmisher rallies and moves one move to the edge of the stream (remember the stream is just decorative in this particular game). Mercenary crossbows fail to rally, shoot with 1 die and miss. Longbows move once ahead, and shoot at the heavy infantry ahead of them behind the hedge (at short range; 4 dice minus 1 for the move, total 3 dice). They miss. Again. Light infantry fails to rally and moves once to get to the right flank. The heavy infantry moves once up the road and then a second move to form up in place (I think I am making this rule up...but it needs it), ending in disorder. William and his Men at Arms move twice up the road and then a third move to form up, ending in good order.
The reinforcement roll is passed, meaning that the last unit, the heavy cavalry, will enter next turn.
End of turn 4

Turn 5
Friendly - William wins the initiative for a change and surges forward. The skirmishers sidestep one move to give the following troops more room. Longbows move one move oblique to the left front, automatically disordering. They shoot at short range with only one die (4 minus 1 for move, minus 1 for disorder, and giving a minus 1 for the hedge). The roll a hit to get a damage, but the target heavy infantry passes its cohesion test (but therefore does end disordered). Crossbows fail to rally, move ahead into short range of the enemy crossbows, and shoot but miss. Light infantry fails to rally but moves once toward the right flank. The heavy infantry rally, move twice forward and end in disorder. William and his knights move twice and end in good order. The newly arriving heavy cavalry move twice up the road and then a third move to form up, ending in good order.
Enemy - Heavy infantry and crossbows both fail to rally. The crossbows have a target now and shoot 2 dice (3 minus 1 for disorder) at the mercenary crossbows and miss. The constable and his men at arms stay on opportunity to keep from having to act on their impetuousness.
End of turn 5

After 5 turns of almost no action, I am satisfied with the exercise so far. I have been able to fumble through a few turns of basics; initiative and turn sequence, command, movement, disorder, rallying, and firing. This is exactly why I set this scenario up the way I did. Things should get much more interesting very soon though, as we have missile troops within short range, formed troops fairly close to each other, and the command issues for the good guys straightened out with the arrival of William. Next order of business will be to get the good guys deployed so they can get stuck in...

...to be Continued

Thursday, October 31, 2013

Impetus Campaign - A Beginning

I purchased the Impetus rules not long after they became available in the US, mainly because I buy just about every rules set I can get my hands on for medievals, but also because it had gotten good press in various blogs and from friends and acquaintances. I have read the rules in fits and starts, several times over, since getting them, and while they looked promising, had never gotten around to actually playing them. Figuring that the only way I ever will is to throw some figures on the table and have a go at it, I have decided to concoct a solo hundred years war era campaign. I have no grandiose plans for this endeavor other than to finally play around with these rules and learn them, fighting a scenario when the mood strikes.

I decided to start very small, and over the last couple of nights have gotten in a few turns of a "baby steps" game.

Raymond of Saint Palais
Background - The campaign will follow the exploits of Lord Raymond of Saint Palais, a noble in the Orthez region of the Pyrenees-Atlantiques region of southwestern France, circa 1380. The region, south of the heart of Gascony, is a semi-autonomous region sandwiched in between the remaining English holdings to the west around Bayonne and north/northwest toward Bordeaux, Spanish Navarre over the Pyrenees to the south, the French Agenais region to the northeast, and the southern French Bearn and Languedoc region to the east around Toulouse. This will allow me to use a variety of troop types from the various army lists covering the French, English, Spanish and other miscellaneous Free Companies, mercenaries and "provincials." In other words, I can justify using any hundred years war figures I own (and other "generic medievals" too)... I will string together scenarios with a loose narrative to hopefully make things more interesting than fighting a series of one-off battles. I intend to develop some random muster tables, random scenario generator ideas, etc, as I go along. We'll see what happens...

To keep track of how Raymond is doing, I will start him out at a 5 on a scale of 1-10, or a "stance rating" of "doing ok so far". Good scenario results will raise his "stance" and bad results will lower it. I will figure out some way to use this to help me plot the course of events. Raymond's full force, which I don't expect to have on the table all at once for a while, will approximate 400 points to begin with, but events can affect this going forward. I have drafted a rough list of his army composition in total, and will use different pieces of it for different games.

Chevauchee, July 1380
William of Navarrenx
As the English holdings in the region have been driven further and further back, the French to the northeast have become increasingly troublesome, threatening the area with repeated raids. Several local Barons have banded together to give the French a taste of their own medicine, and have launched a raid northeast towards Agen. In addition to our own Raymond, the other two main forces are led by Bertrand of Dax and Thierry of Orthez. These three forces are advancing somewhat independently as they ravage the countryside, and may or may not be able to support each other at any given point in time. Raymond's army has two subordinate commanders; William of Navarrenx and Henry of Cheraute.

The Scenario
Raymond's forces have crossed the Adour river at Aire-sur-l'Adour and are headed generally northeast. As one of Raymond's contingents under William of Navarrenx approaches the village of Cazalet, it finds a small enemy force drawn up behind a stream to oppose it. William's goal is to brush aside this blocking force to rendezvous with Raymond beyond Cazalet.

William has 7 units with him at the moment [most troop profiles are from the English list]:
William's forces at start
  • His household unit of Men at Arms (impetuous) [Gascon MAA]
  • Heavy cavalry [English hobilar CM]
  • Heavy infantry billmen
  • Light infantry spearmen
  • Longbows
  • Mercenary crossbows
  • Skirmishers with short bows

The enemy, led by the local constable [most troop profiles are from the French list]:
  • Local Men at Arms (impetuous)
  • Heavy infantry
  • Two units of local levy/militia infantry
  • Crossbows [French T]
On this day, both leaders randomly came up rated "fair", and both command structures are "poor." This translates to a friendly force of 137 points vs an enemy force of 84 points. I selected the troops first then added the points up out of curiosity.

The defenders of Cazalet
Setup and special rules - The battle will be fought lengthwise down a 4' by 6' table. The enemy force will be behind a stream that is cosmetic only, but will have a small hill and a few hedges. The four friendly light and missile units begin on the board, the heavy infantry and two mounted units (and William) will arrive randomly. At then end of each turn, the friendly player will roll one die, and if the result is less than or equal to the turn number that is just ending, the next friendly unit will arrive the following turn. The heavy infantry arrives first, followed by the Men at Arms and William, with the heavy cavalry arriving last. William's goal is to exit the far board edge as quickly as possible while taking as few losses as possible (nice and vague...). The friendly player will be hampered by lack of an on-board commander for some part of the game while William gathers his spread out forces to engage the enemy (i'll use the 10U poor command range from the board edge until he arrives). That being said...this shouldn't be too difficult for the good guys while I familiarize myself with the basic rule mechanics...

...to be Continued